Tutorial
How to Correctly Deploy a Django 3.2 App on Heroku and Avoid 500 Server Error
Step-by-step guide to deploying a Django 3.2 app on Heroku with gunicorn and WhiteNoise, including static files, Procfile, and avoiding common 500 errors.

When I wanted to deploy my Django website to Heroku, it was a nightmare—starting with errors related to static files, Heroku complaining about several things in the log, and finishing with a 500 Server Error.
After about 13 commits trying to deploy on Heroku (visit the repo if you want to check the commits), I went through all kinds of errors. That's why I decided to write this article so other people can avoid those errors as much as possible.
As we know, Heroku is a good place to deploy our dynamic web apps, but that comes at a certain cost—dealing with static files, some unexpected errors, etc. But it's still a pretty good deal compared to getting your dynamic app hosted for free.
Assume that you are already familiar with the basics of Django—I mean, how would you even deploy a Django app if you don't know anything about Django?
Create and configure the app on Heroku#
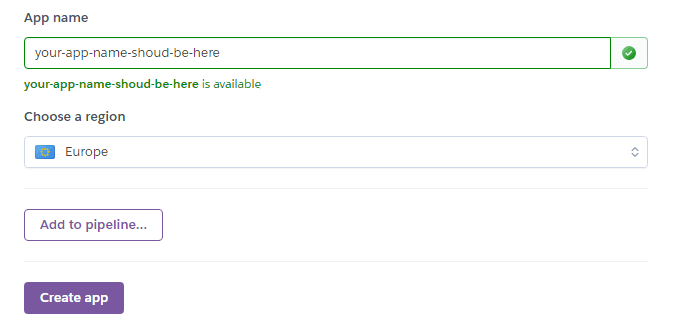
First, go to the Heroku dashboard, then create a new app, give it a name, choose a region close to you or your target audience to gain a bit of speed in loading your application, then click Create app.
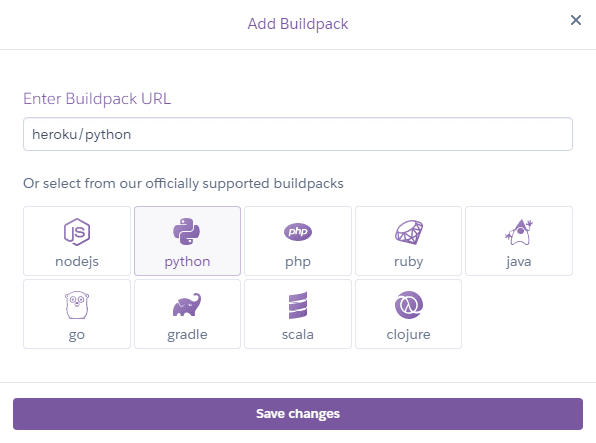
After your app is created, go to Settings > Buildpacks, click Add buildpack, choose Python, then Save changes.
Configure your Django project#
In your project folder go to settings.py and set DEBUG to False and add your app URL (provided by Heroku) to ALLOWED_HOSTS. Usually the URL will be app-name.herokuapp.com; this is a list so you can add multiple hosts.
...
DEBUG = False
ALLOWED_HOSTS = ['pollsappdjango.herokuapp.com', '127.0.0.1']
...
The next step is to install gunicorn to handle server-related stuff and whitenoise to handle static files. Make sure you install these with your virtual environment activated so you can extract requirements.txt later.
pip install gunicorn whitenoiseThen run (with your virtual environment activated):
pip freeze > requirements.txtThis will generate all the dependencies Heroku needs to run your application.
Go back to settings.py and add whitenoise.middleware.WhiteNoiseMiddleware to the MIDDLEWARE list so Heroku can handle your static files correctly (you can read more in the WhiteNoise documentation). Your MIDDLEWARE will look like:
...
MIDDLEWARE = [
    'django.middleware.security.SecurityMiddleware',
    'whitenoise.middleware.WhiteNoiseMiddleware',
    'django.contrib.sessions.middleware.SessionMiddleware',
    'django.middleware.common.CommonMiddleware',
    'django.middleware.csrf.CsrfViewMiddleware',
    'django.contrib.auth.middleware.AuthenticationMiddleware',
    'django.contrib.messages.middleware.MessageMiddleware',
    'django.middleware.clickjacking.XFrameOptionsMiddleware',
]
...
Create a file called runtime.txt at the root of your project and write the Python version you use. To check your version, run in the terminal:
python --versionThen write it in runtime.txt (e.g. for Python 3.8.5):
python-3.8.5Create another file for Heroku config—this file is called Procfile (no extension). Inside it write:
web: gunicorn projectName.wsgi --log-file -Replace projectName with the name of your project folder that contains settings.py and wsgi.py (e.g. in my case it was core).
Again in settings.py, add this (make sure you import the os module):
...
STATIC_ROOT = os.path.join(BASE_DIR, 'staticfiles')
...
With all these steps your Django app will deploy without errors. But in some cases when you try to access your app you may still get a 500 Server Error. To avoid that, run this in the root of your project:
python manage.py collectstaticThis command collects all the static files of your project so Heroku can serve them.
Deploy from GitHub#
Next, add your project to GitHub (we'll deploy via GitHub from Heroku). Push your project to a GitHub repo (private or public—your choice). Then go to your Heroku app dashboard, open the Deploy tab, and choose GitHub.
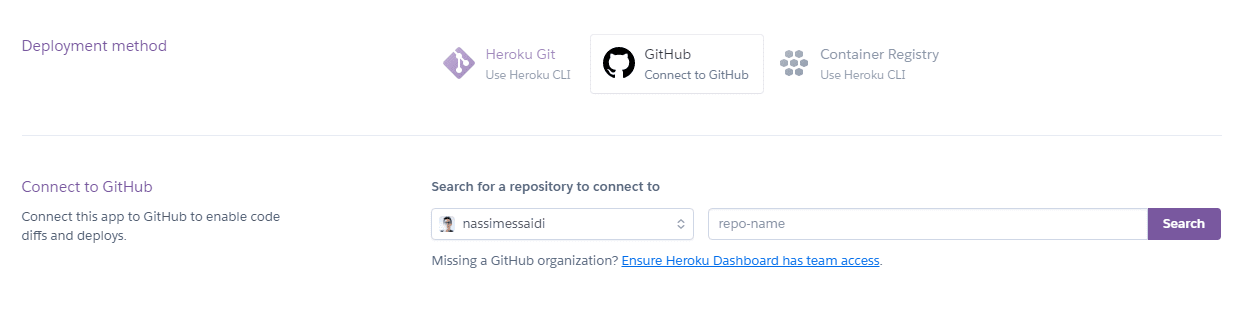
Search for your repo and click Connect, then click Deploy Branch. Your application should work.

Make sure db.sqlite3 is in the repo, otherwise you'll get a 500 error because the app can't fetch data from anywhere.
In the near future I'll write an article about how to set up a Postgres database with your Django project, because db.sqlite3 is not ideal for production in terms of efficiency and scalability.
Recap#
- Create and set up the app from the Heroku Dashboard
- Install
gunicornandwhitenoise - Generate
requirements.txt - Make the changes in
settings.py - Add
runtime.txtwith your Python version - Add a
Procfilewith the Heroku process command - Run
collectstaticto avoid 500 errors - Don't forget to add
db.sqlite3to the repo so the app can fetch data
Thank you for reading, and stay tuned for setting up the Postgres database with Django on Heroku.
Related posts
How to Install and Use Tailwind CSS with Django 3.2 (2021)
Configure Django 3.2 to use Tailwind CSS with a Node-based build step, including tailwind.config.js, static files, and production purge.
May 21, 2021 · 3 min read
How to Set Min and Max Range for Radial Bar (Gauge) in ApexCharts
A workaround to customize min and max values for ApexCharts radial bar (gauge) charts, including formulas for percentage conversion and data label formatting.
Sep 7, 2021 · 3 min read
Domain Is Already Owned by Another Vercel Account – Solution
How to resolve the 'domain is already owned by another Vercel account' error when adding a custom domain, including the Hashnode subdomain case.
Sep 6, 2021 · 2 min read